WiFi Streaming
This part of the documentation is about streaming data from HackEEG via WiFi to software running on a different computer using a Raspberry Pi 4.
You will need a Raspberry Pi 4 set up with Python 3.6. These instructions will show how to set that up and install HackEEG on it.
Installing Raspbian
Download and install Balena Etcher. This is a program that can write disk images to SD cards.
Download the latest Raspbian Lite image. This tutorial focuses on Raspbian Lite that has no GUI, but any version of Raspbian will work. (Raspbian downloads page)
Use Etcher to write the Raspbian image to the SD card using the SD card reader.
Mount the card on your laptop by pulling out and reinserting the SD card. It should show up as a disk volume named
bootIt should show up as a disk volume namedboot.Create a file named
ssh— this will enable the ssh server.Create a file called
wpa_supplicant.conf. This is a configuration file that will allow you to pre-configure the WiFi credentials. On boot, the Raspberry Pi will copy and use this as the default configuration file. Put the following content in it:country=US ctrl_interface=DIR=/var/run/wpa_supplicant GROUP=netdev update_config=1 network={ ssid="WIFI_SSID" scan_ssid=1 psk="WIFI_PASSWORD" key_mgmt=WPA-PSK }
Put the SD card into the Raspberry Pi.
Connect the charged USB power bank to the Raspberry Pi’s USB-C power connector.
Install Python 3.6
ssh to
root@raspberrypi.localInstall
pip:sudo apt-get install python-pip
Install Python requirements:
sudo apt install bzip2 libbz2-dev libssl-dev libreadline-dev
Install
pyenvcurl -L https://github.com/pyenv/pyenv-installer/raw/master/bin/pyenv-installer | bashInstall Python 3.6 – this may take a while because it’s going to compile Python.
pyenv install 3.6.8
pyenv global 3.6.8
Installing HackEEG on a Raspberry Pi 4
- Follow the regular installation instructions for HackEEG.
Connecting OpenBCI to HackEEG via Lab Streaming Layer
IMPORTANT! Ensure you are running on battery power. HackEEG has no mains isolation circuitry.
Connect to the Raspberry Pi 4 via ssh:
$ ssh root@raspberrypi.local
$ cd hackeeg/
Start the
hackeeg_streamprogram:$ hackeeg_stream --sps 500 --continuous --lslYou should see the HackEEG blue board LED blink briefly to indicate proper operation.
Start OpenBCI as described in Installing OpenBCI
Select
Live (from Lab Streaming Layer)Select
8 channelsClick
Start SessionClick
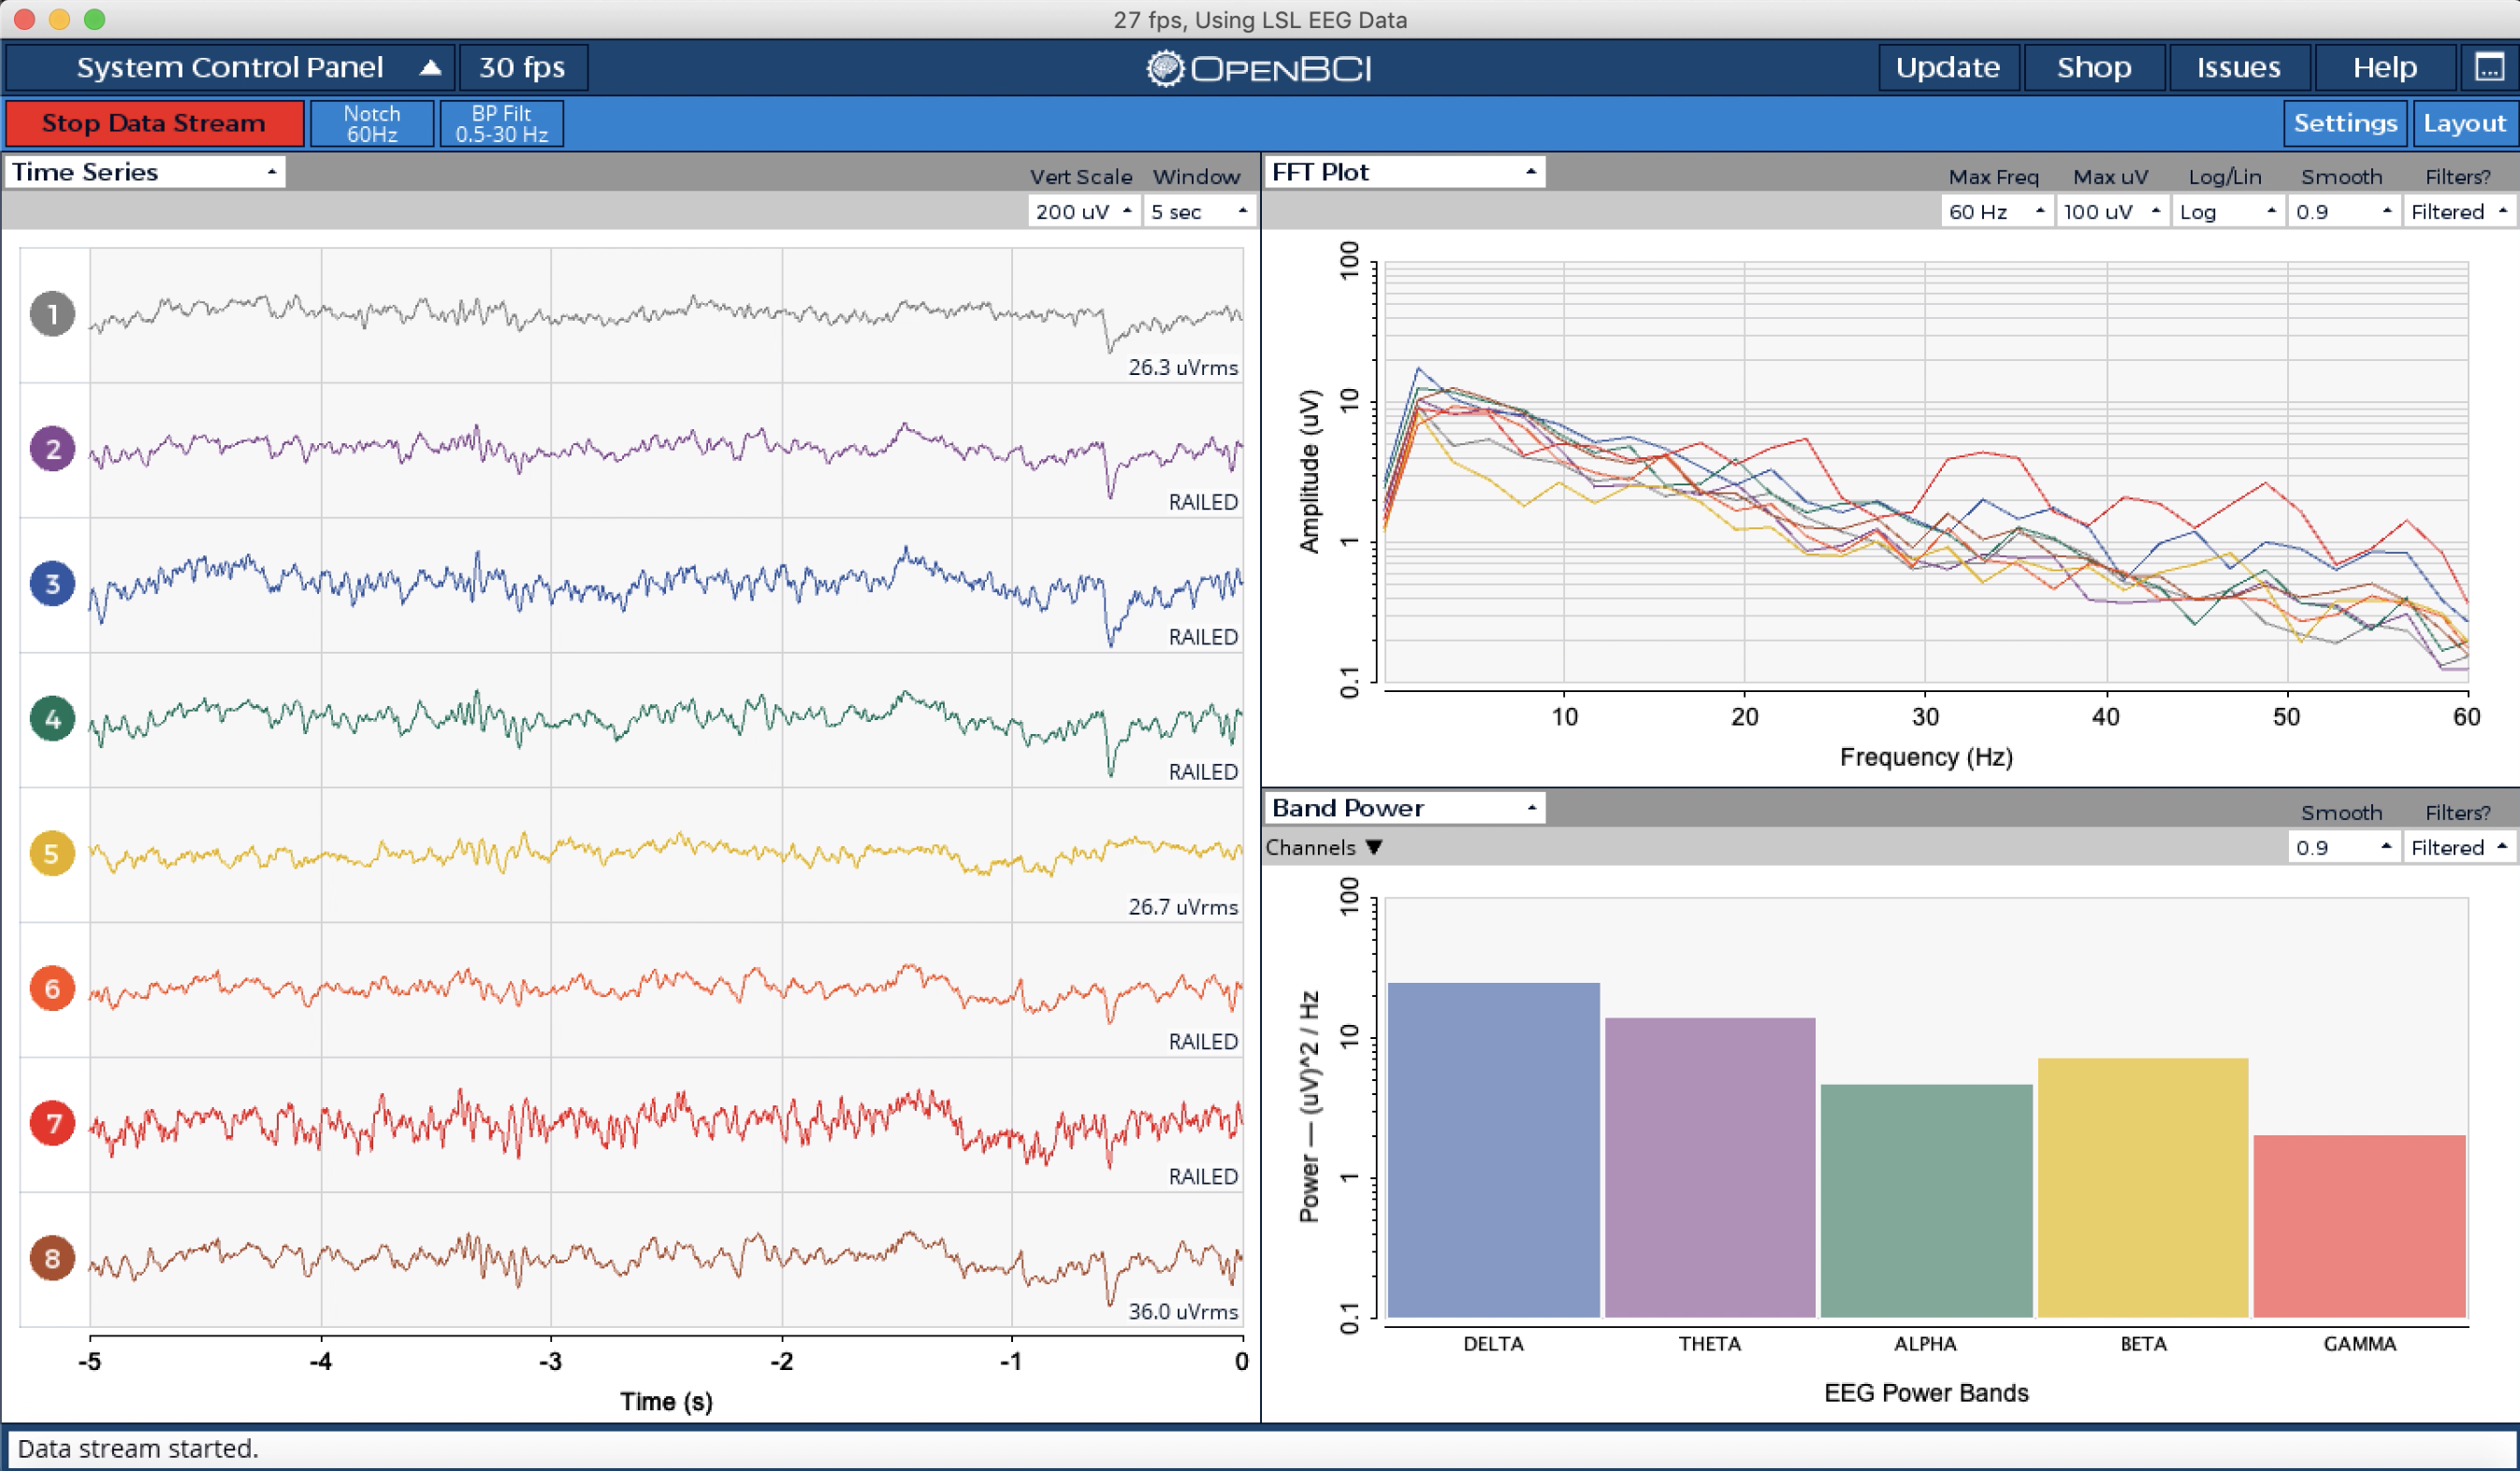
Start Data StreamIn the lower right widget drop-down, select the Band Power widget
You should see something like this:
Credits
Thanks to Losant for their article Getting Started with the Raspberry Pi Zero W without a Monitor that part of this documentation is based on.